Introduction
ArrayStudio
Array Studio runs local NGS analysis in 64-bit mode on a Windows 64-bit computer with at least 8GB of RAM. Server-based analysis allows the user to run jobs on a remote server (Linux or Windows), which usually has more computing power than a desktop computer. This tutorial is based on local NGS analysis using a Windows Workstation (Windows 10 Pro) with a 3.60GHz Intel® Core TM i7-4790 Processor (# of cores: 4; # of threads: 8) and 16GB RAM.
It is highly recommend that the user complete the prerequisite for this tutorial: the Microarray tutorial, as a way to learn the basics in Array Studio. This tutorial assumes working knowledge of Array Studio, standard visualizations, and different modules within the software. As many of the downstream data types from next generation sequencing are "Microarray" datasets, the Microarray tutorial is an invaluable starting tool.
Single Cell Solutions
Single-cell RNA-seq is a rapidly developing field with many methods of isolating single cells and generating libraries for NGS sequencing. Below is an example that demonstrates the varying types of methodologies available to isolate single cells:

As shown in the diagram, single cell RNA-seq can be split into two categories, UMI (Unique Molecular Identifier) and non-UMI studies. With Single-Cell studies, since the input material is relatively low, there can be an amplification bias that is introduced during library preparation. UMIs have been developed to uniquely tag RNA molecules to reduce this amplification bias. For studies using UMI protocols, this requires users to incorporate these tags into the design and analysis of the RNA-seq experiment. Often, this involves a combination of barcodes, attributed to each cell, and UMIs identifying each RNA molecule amplified. Depending on the experiment, this information can be stored in different locations within the .fastq files that are obtained from a sequencing facility.
OmicSoft has developed modules to allow its users to analyze these complex datasets using the simple interface in the ArrayStudio GUI. The workflow consists of a number of modules for scRNA-Seq data processing, including pre-processing, filtering reads, tag-based QC, alignment, quantification, and a series of optional downstream analyses, as shown in the schematic chart below:
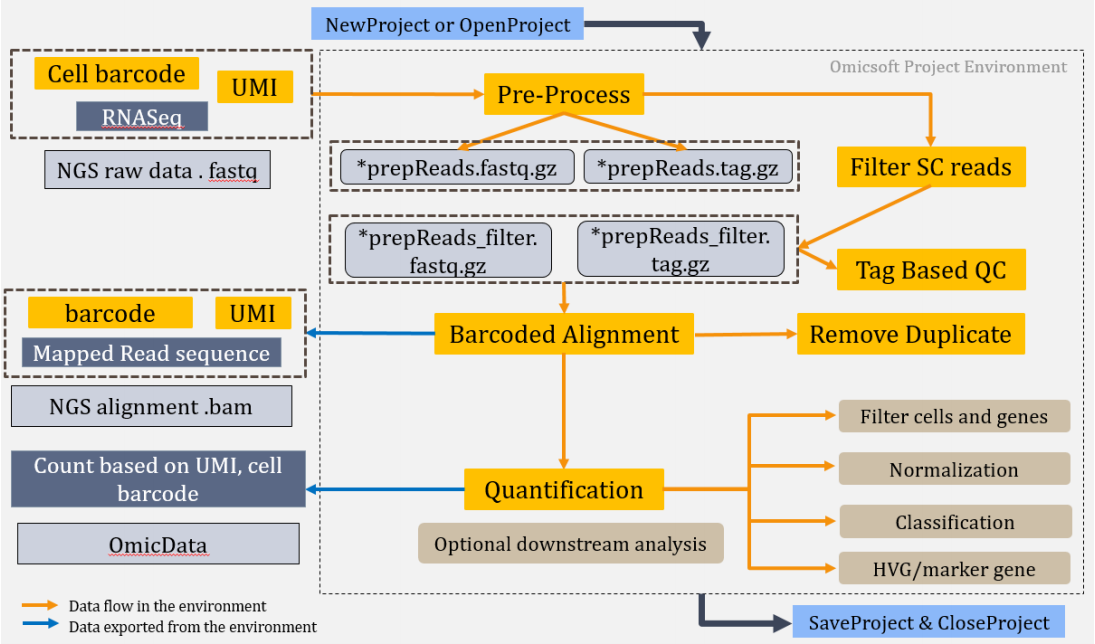
These modules can be joined together to allow the user to step through from pre-processing to quantification in a single workflow.
Tutorials
A very popular platform for obtaining single cell RNA-seq data is available through 10X Genomics. For this reason, we have developed modules and training material for 10X Genomics, which are also applicable for all other UMI-based experiments. For non-UMI based scRNA-seq datasets, the standard RNA-seq workflow can be used to align the raw data. For all the single cell datasets described, OmicSoft has a number of downstream analyses options to aid in classification and visualization of clusters of cells, differential expression, and marker gene identification.
Create Server Project
Array Studio provides an integrated environment for analyzing and visualizing high dimensional data, such as that generated in scRNA-Seq experiments. The convenient Solution Explorer, which organizes data/results as "projects", allows the user to access and visualize data easily. Users can create a local project which uses the local computer power to do analysis, or create a server project which will run all analyses in Array Server. This tutorial will use server projects. If a user doesn't have Array Server installed, the user can instead run the tutorial as a local project, and the analysis steps will be very similar to those described in this tutorial.
Note: If the user is using a local project to analyze the scRNA-Seq data in this tutorial, please refer to our tutorial for “RNA-Seq Analysis” about creating ArrayStudio local Project: Create Projects.
In order to analyze the data in a server project, users should first connect to a server and upload the .fastq files if they are not already accessible on server folder: Connect to Server and Upload Files
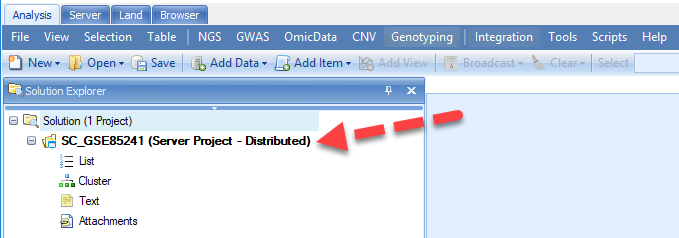
The user can then create a server project for the following analysis: Create Server Project, as shown here.